Unfortunately, there is not an Apple App Store nor Google Play Store App available for Beyond Legend: Avatar Legends VTT at this time. However, utilizing the Progressive Web App (PWA) framework on both iOS and Android this site is designed to act like an App on mobile devices.
You can add Beyond Legend: Avatar Legends VTT to your device's Home Screen using the following instructions:
Apple iOS:

Android:
In the Address bar tap the three dots to open the menu.
Select the "Add to Home Screen" option.

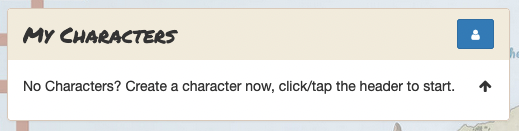
First press the blue button in the 'My Characters' header:
In the 'My Characters' page press the '+ New Character' button:

You will then be prompted to choose a Playbook. A brief summary of each playbook is displayed, for more detailed descriptions of each playbook please refer to the Avatar Legends Core Rule Book.

Once you have chosen a playbook, select the dot in front of the playbook name and press the 'Build Character' button. You will now see a blank character sheet:
Based on the playbook you have chosen there will be different options available only to that playbook. When you press a Bender or Non-bender training style a red border will appear showing that training discipline has been selected for this character. There is an option to upload an image of custom artwork of your character. On this page there are info bubbles, you can press these bubbles for more information about the character option section. For full rules and details on character creation please refer to the Avatar Legends Core Book.

Once you have entered all the data and made all your selections for your character press the "Save" button at the very bottom of the page. On successful save of your character you will be directed to the Character Summary page, This will show the summary of your character with all selected options. This Character Summary is where you will play your character from while In Game. Any In Game status changes like Fatigue, Balance, Conditions, Exchange Statuses, and your Inventory can all be updated from the Character Summary page.
Please Note: any "fundamental" changes to your character, ie: new Moves, Changing Special Actions selections, Changing Center of Balance, these changes are made in the Character Builder page, you will need to press "Edit" in the top right to make those changes.
In the Character Summary, your primary gameplay area with the red border and parchment paper like background will be where the majority of your play interactions will occur. Virtual Dice rolls can be triggered by pressing the dice icon, the STATS names, Balance Principle names, or the maroon colored move names in the Conditions section.

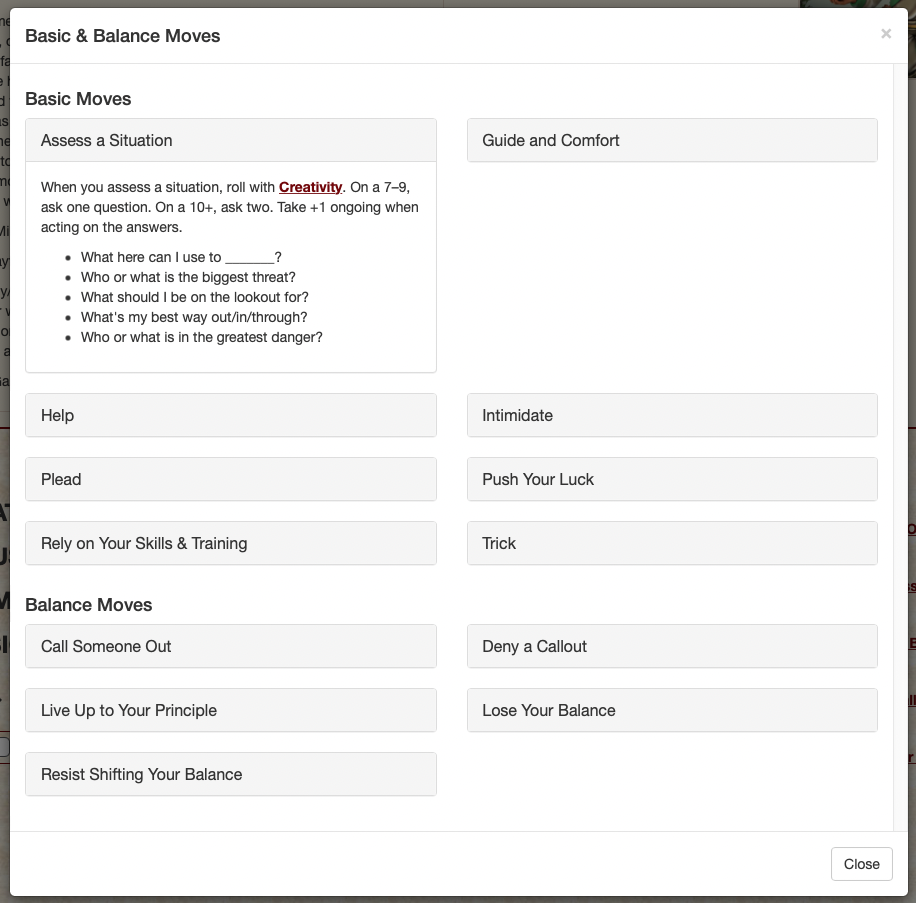
The "Moves" button will display details about the in-game basic and balance moves that can be triggered. (press the Move Name header to expand the panels for details) Like the Conditions section the maroon Stats Names trigger the Virtual Dice.
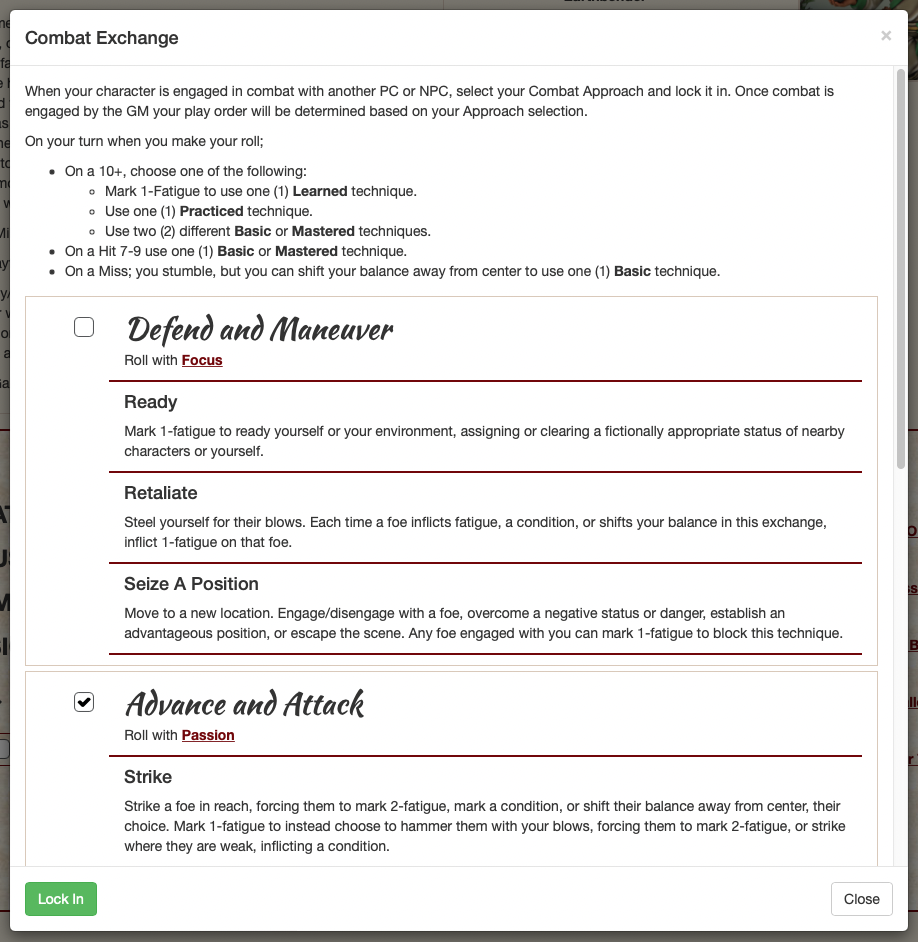
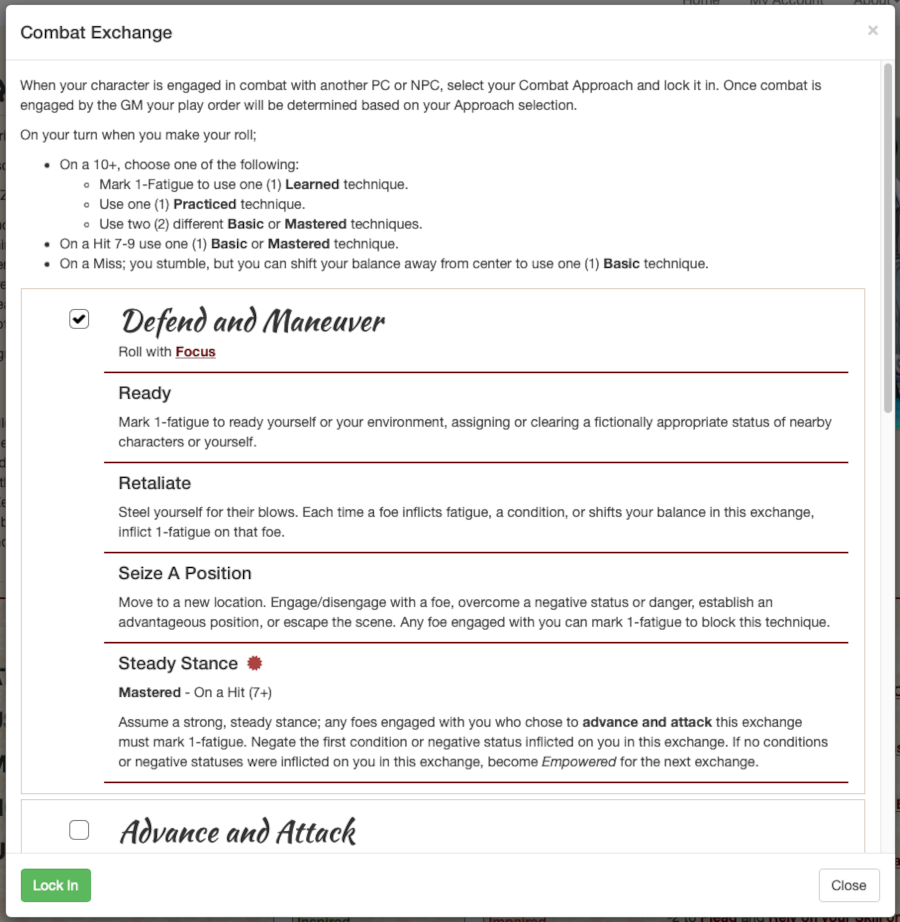
The "Combat" button opens the Combat Exchange information pop, you will see a list of basic combat moves for each combat approach. When the GM initiates Combat from the GM Dashboard you will be able to select and Lock In your chosen Combat Approach. When the GM resolves the exchange, all PCs and NPCs will be placed in the correct play order. You will then be able to trigger a Virtual Dice roll and read about the combat move(s) you'd like to make. Please Note: any playbook specific combat moves or any additional Learned, Practiced, or Mastered techniques will show in the correct approach section.
Since the Character Summary is the main game play interface for your character. The sheet auto updates every 10 seconds to keep sync with any other devices you may have your sheet open on, as well as with the GM Campaign Players Dashboard.
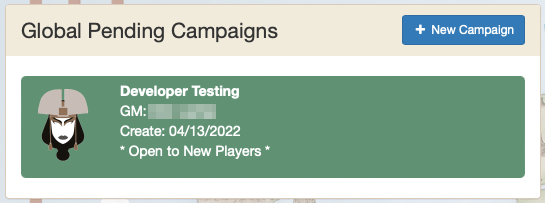
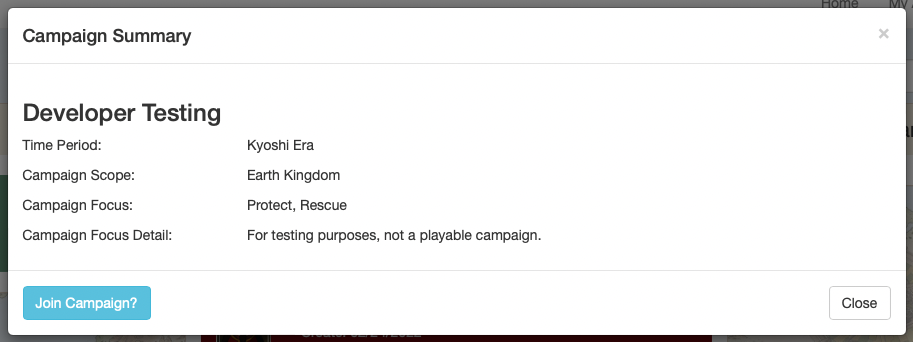
From the "My Campaigns" page there is a panel for "Pending Campaigns" these are campaigns that have been created by a GM and are still in the planning stage. Game play sessions on these campaigns have not yet started and they are listed as "Open to New Players" When you press on these campaigns a summary of the campaign will pop up, and a light blue "Join Campaign?" button will be available (Note this button will not be available if the campaign is closed and in progress).
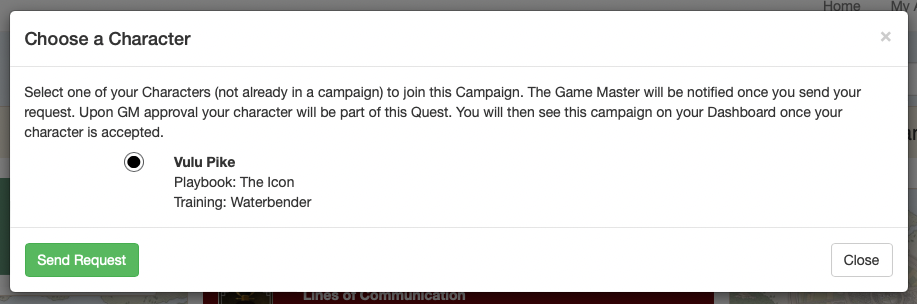
When you press the Join Campaign button a new popup will display showing any characters you have built that are not already part of another running campaign. You can then select the appropriate character and then press "Send Request". A request from your character will be sent to the GM requesting permission to join the quest. The GM can then Approve or Deny this request. Once the GM acts on the request you will be notified in your Messages. If approved; on the Home User Dashboard you will see the campaign listed under My Campaigns. Pressing on a joined campaign will open the Character Summary for the character that is now part of that campaign.
If you are late to a campaign (or you needed to retire a previous character for any reason) and the GM is willing to work your character into the story, the GM can manually add your character to an In Progress campaign from their Campaign Editor sheet. You will not need to take any additional actions to join. Just like when sending a request you will be notified when the GM manually adds your character.
Yes! Sometimes a GM will create the characters for their campaign; and then will distribute them to players later, or a player will withdraw from a game for some reason and may want to hand off their character to another player. What ever the reason may be, there is a way to transfer ownership of a character to another member.
To transfer ownership of a character, from the main user dashboard open Messages, by pressing the blue envelope icon in the top Menu Bar: 0
From Messages select Compose

Next, Search for the member you want to transfer a character to. You may search by real name, username, email, or twitch/discord handle (if entered)
When the member is displayed, select the yellow Character button.

A popup will display a list of all characters you created on your account. Select the one you want to transfer to the selected member, press Send, and confirm that you really do want to send this character.

The Recipient member will get a notification that you have sent a character to them. They can then choose to accept this character to decline the character

Once the recipient accepts or denies the character, you will get a notification of their choice. This example shows the character was accepted by the new member.

Welcome to the Game Master's Dashboard. Your one stop for all game play information. The GM Dash is broken into two core sections Basic play and Combat Exchanges. In each section there are 3 sub-sections diving deeper into the details of play mechanics. There is also a sliding game log panel that will show any character changes, virtual dice rolls, and combat resolution play ordering. This dashboard is your information center for any questions that may arise during a game session.

The "Start Session" button will enable session logging, so any character changes, virtual dice rolls, and combat exchanges will be logged until you press "End Session". For Avatar Legends there are some start of session and end of session events that occur ... a reminder for these starting and ending actions will be displayed accordingly.
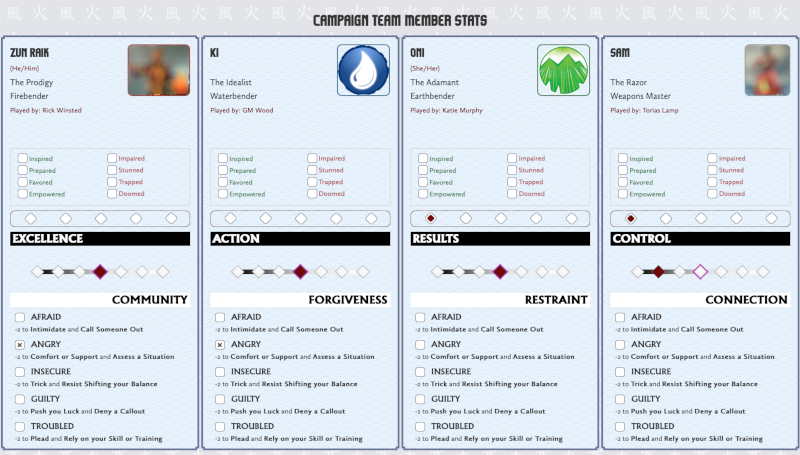
The "Character Stats" button will show the Campaign Players Dashboard. This is a Read Only display of each character's current status. This page updates every 10 seconds with the players character summary sheets so you can see in relatively real time the current status of each player character.
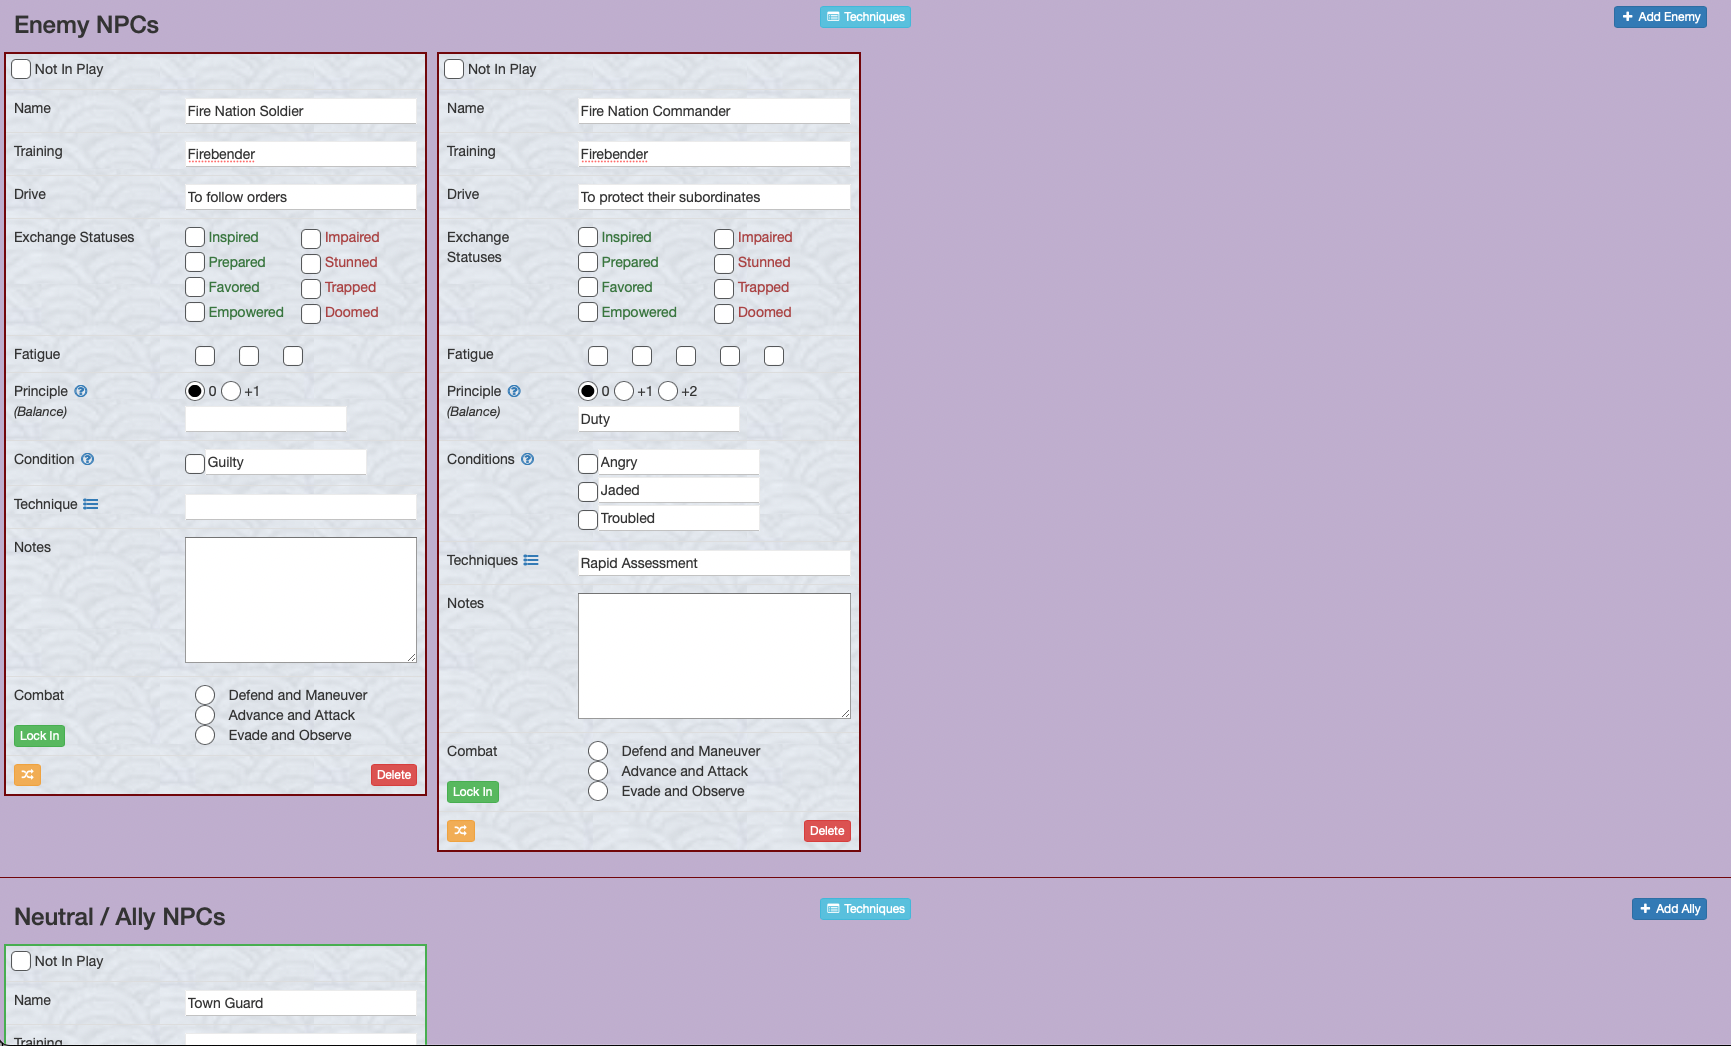
The "NPCs Stats" button opens the NPC Manager window. Here you can create Enemy and Ally NPCs, select their Combat Approach and manage NPC's Fatigue, Conditions, and Balance status. When creating new NPC's there are a number of Preset NPCs ie Soldiers, Town Guard, Dai Li Agent, Leaders, Generals, even Avatars from the Core Book and Wan Shi Tongs expansion. You can save custom NPCs using the "Manage Custom NPCs" button. These NPCs will be available to only you in any of your campaigns.
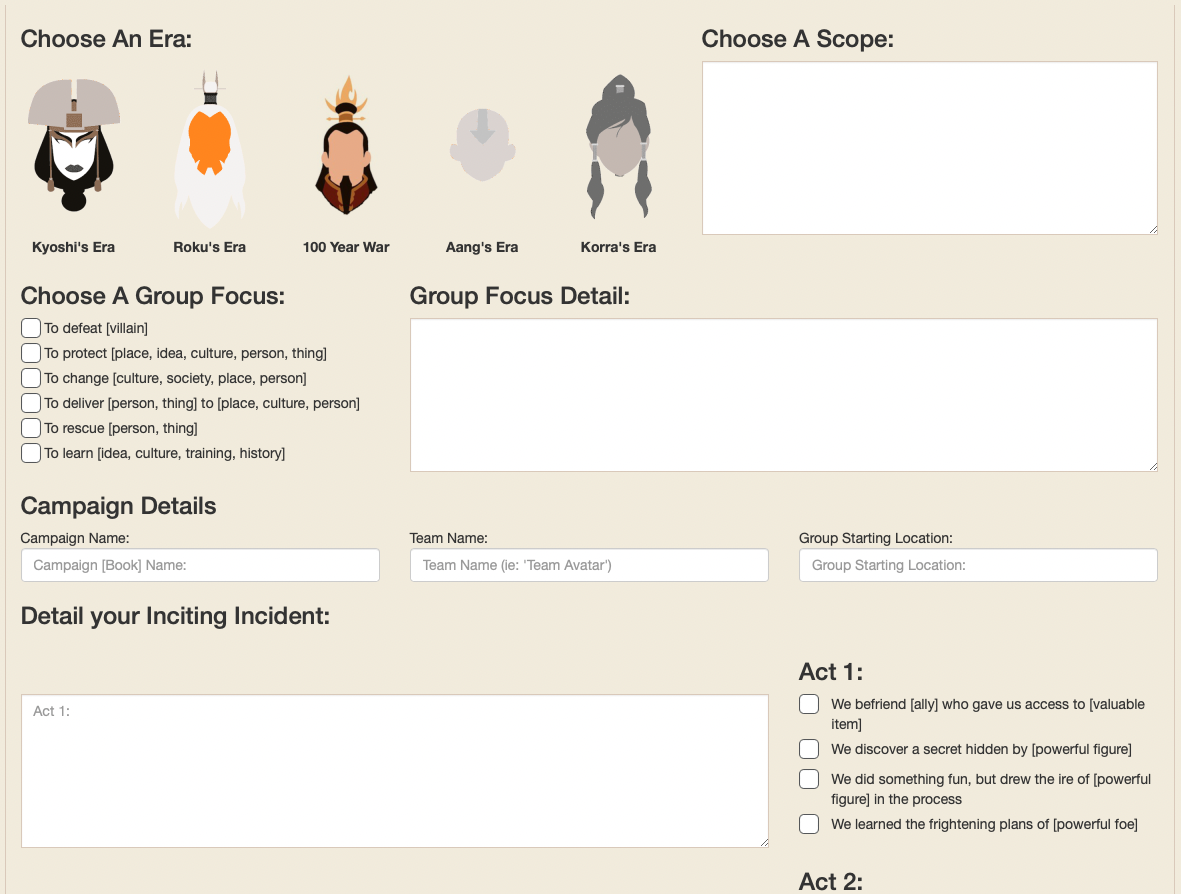
The "Campaign Sheet" will open your campaign data sheet allowing you to add/edit/or just reference notes and details for this campaign. You may also manually add new (or remove) Characters to your campaign from this sheet using the "Manage Players" button.
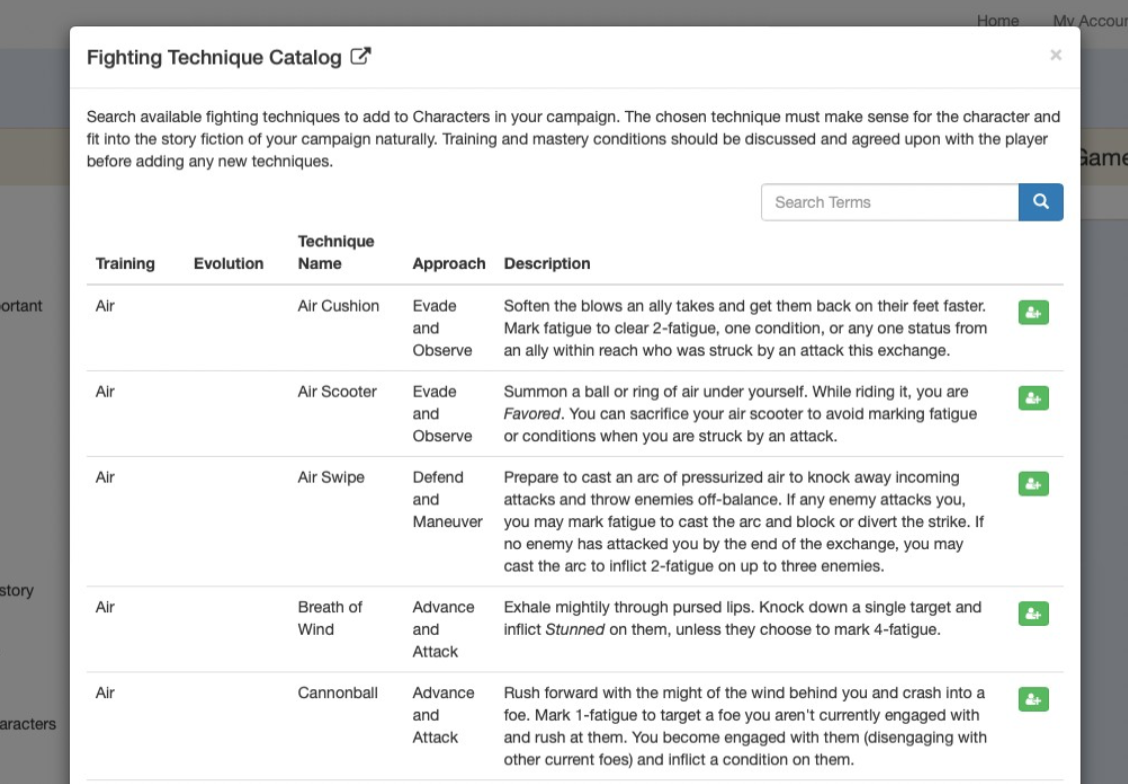
The "Techniques" button will open the Fighting Techniques Catalog, here you can add new fighting techniques to player characters as needed during game play.
Combat Exchanges: when you press the "Initiate" button, this will unlock the ability for each Player to select and Lock In their Combat Approach from their character sheet. Once all players have locked in their approach and you have locked in each NPCs approach, pressing "Resolve" will then display the order in which Players and NPCs resolve their moves. If another round of combat happens just press "Initiate" to start the process again.
New Fighting Techniques can be added to a Character from the GM Dashboard. Since there needs to be a discussion with your GM about how you learn and master the technique anyway. Your character must be part of a campaign before new Techniques can be added by the GM.
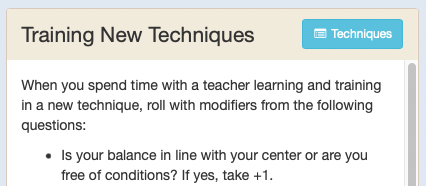
From the GM Dashboard in the "Training New Techniques" panel, press the [Techniques] button ... that will open a popup window of all available Fighting Techniques.
Scroll through or search for the technique you want, there will be a green button with an icon of a person and a plus sign, when you hover over it the tooltip "Add Technique to Character" will show.
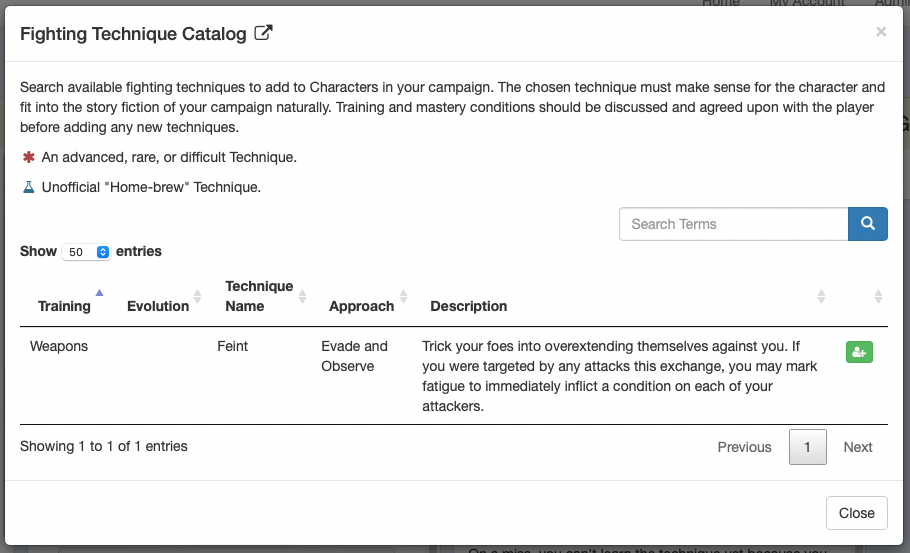
When you press that green add to character button; another pop will display where the GM can then select what Character in their campaign to add the new skill.

Once the GM press the "Add" button, you will see the technique on your character sheet and in the proper Approach section when you trigger the Combat popup within your sheet. You can then manage the skill levels (Practiced, Mastered) from the Character Editor when appropriate.
To Add or Edit custom NPCs for your game play; From the NPCs Stats dashboard, press on the blue "Manage Custom NPCs" button.

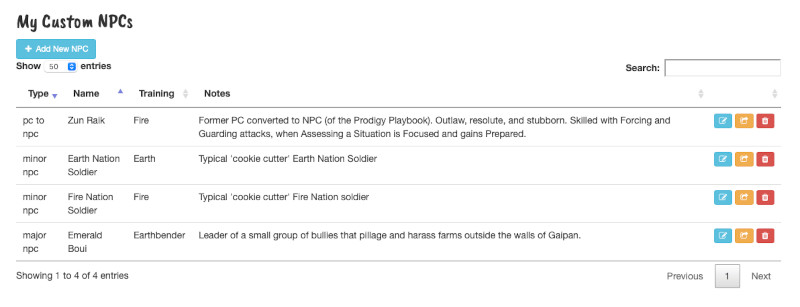
In the My Custom NPCs page you will see a list of all custom NPCs you have created. Here you can Add New, edit, or delete existing NPCs
When you Add new or edit an NPC you will have a popup to enter the details for this custom NPC. The number of conditions will be dynamic based on the NPC model, Minor NPCs have 1 condition, Major have 3 ... and so on. By pressing the blue text for Principle, or Conditions, you will see a list of suggestions based on Core Book NPCs and Playbooks.

Once you have saved the custom NPC details, you can add your custom NPC to your game. In the NPCs Stats dashboard, when you Add Enemy or Add Ally your custom NPCs will display at the top of the list before the core preset NPCs. A search option in this Use Preset dropdown will make it easy to find your custom NPCs or Core NPCs that you may wish to add to your campaign.

Yes! From the NPCs Stats dashboard, press on the blue "Manage Custom NPCs" button.
In the My Custom NPCs page you will see a list of all custom NPCs you have created. From here you can press the yellow "Share NPC with another GM" button.
The Share NPC with another GM popup will display, giving you the option to search for the Member you'd like to share your NPC with. Press the yellow "Share NPC" button next to the name of the Member. Once you confirm that you want to share, the NPC will be duplicated and associated with the other member, they will be able to view the shared NPC in their Custom NPCs manager.

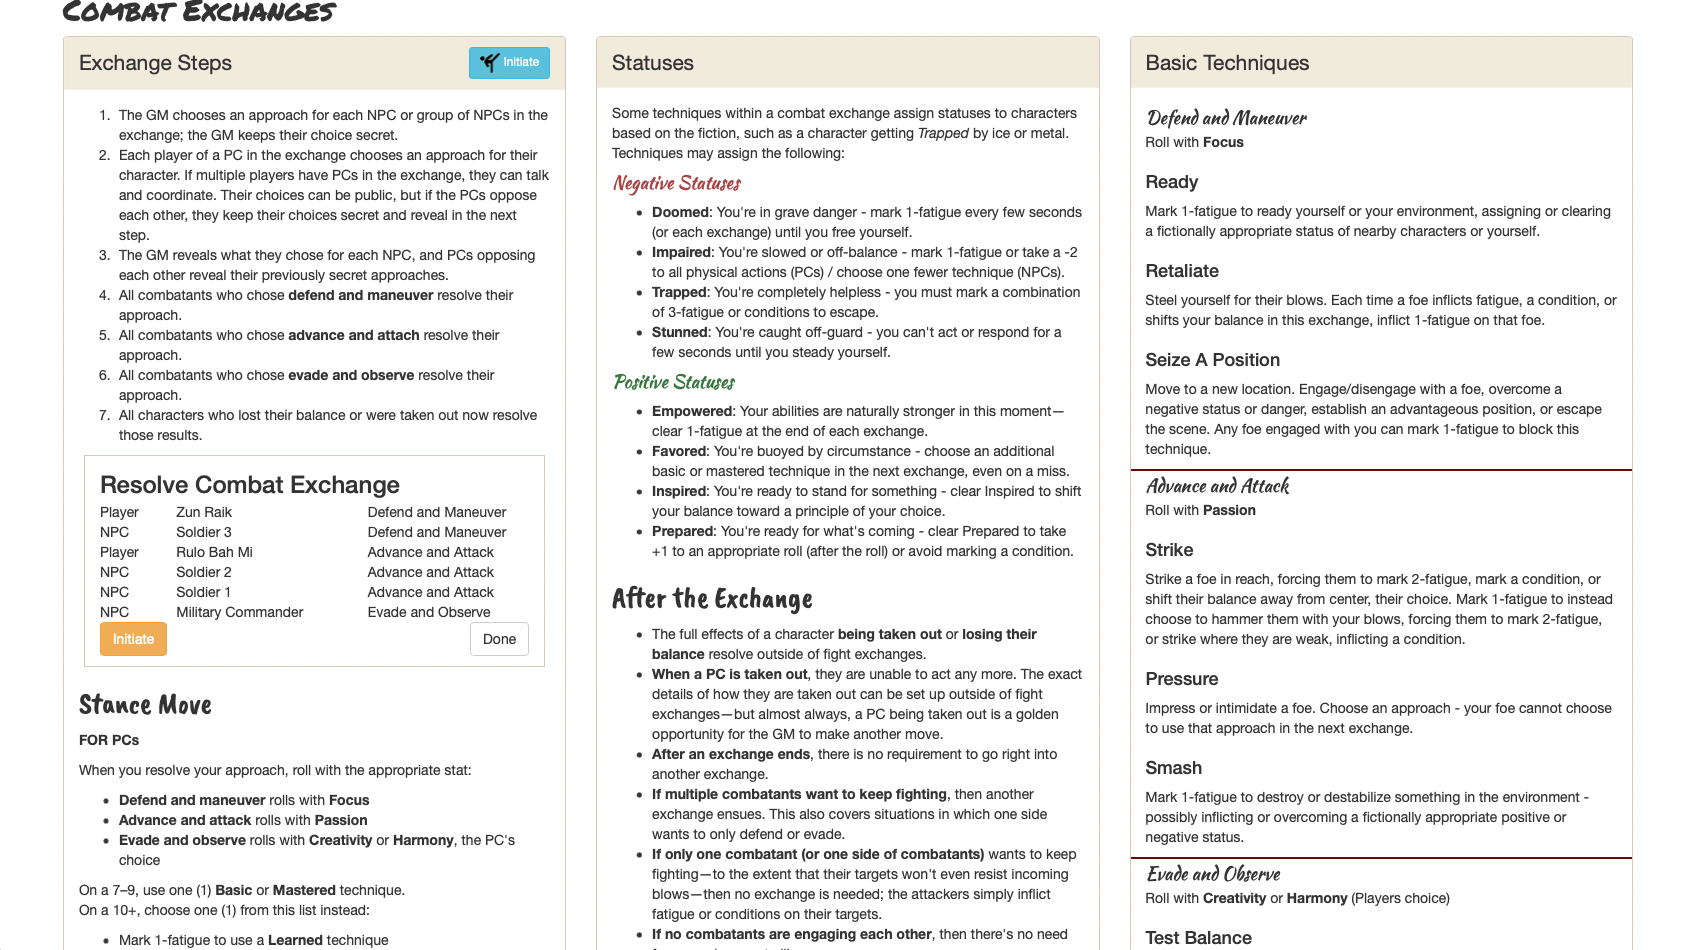
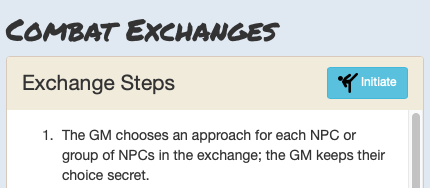
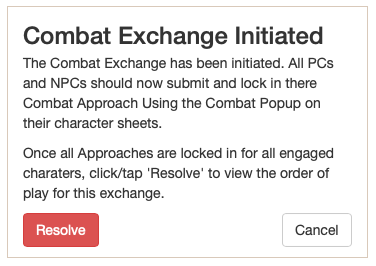
The Beyond Legend GM dashboard has a detailed step-by-step Combat system. When your players enter into a Combat situation, from the GM Dashboard, Scroll to the Combat Exchanges section. In the Exchange Steps, press the blue "Initiate" button.
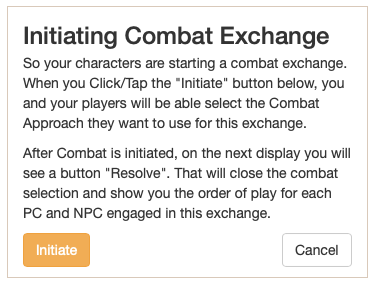
This button will slide open, and auto scroll to, the "Initiating Combat Exchanges" panel. You will now see a yellow "Initiate" button. Once you press this button, your PCs and NPCs will be in combat mode.
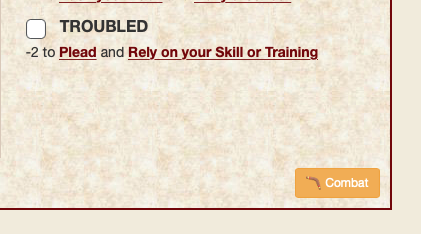
Player Characters: from their character summary sheet, press the "Combat" button to open the characters available fighting techniques.
Players can discuss among themselves how they want to proceed. The Player will select their approach and press the "Lock In" button.
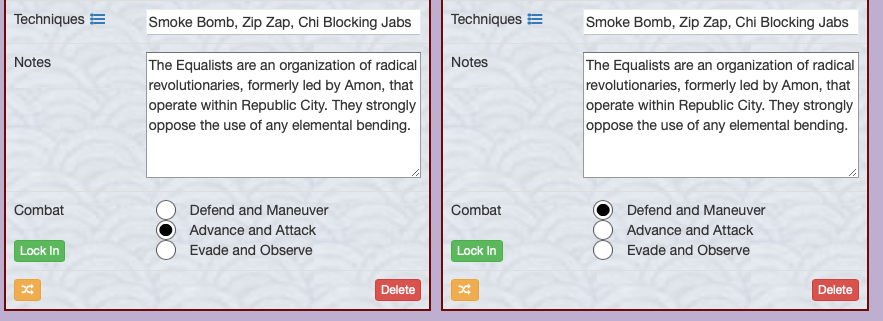
Game Master: for each NPC involved in the exchange, select the NPC's combat approach, you may press the three lines by Techniques to see what fighting techniques are available for each approach. Once ready press "Lock In".
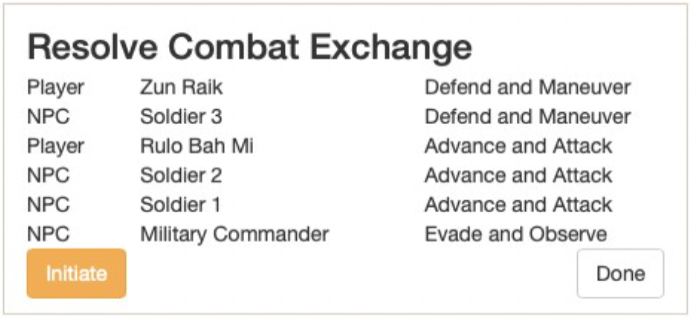
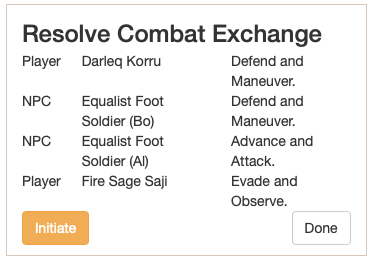
Game Master: Once all Players and NPCs have their combat approaches locked in, Press the red "Resolve" button in the "Initiating Combat Exchanges" panel.
You will now see a list of Player and NPCs in order of play based on the Combat exchange game rules. This will be logged in your Game Session Log for later review after this panel is closed.
If the Players go for another round of combat, just press the yellow "Initiate" again and start the Combat flow over. Once Combat has ended press "Done" to clear and collapse this panel.
Note: In Combat PCs will always move before NPCs if the same approach is selected. However; if Combat is between two or more PCs choosing the same approach, then play order will be determined by which player locks in that approach first.
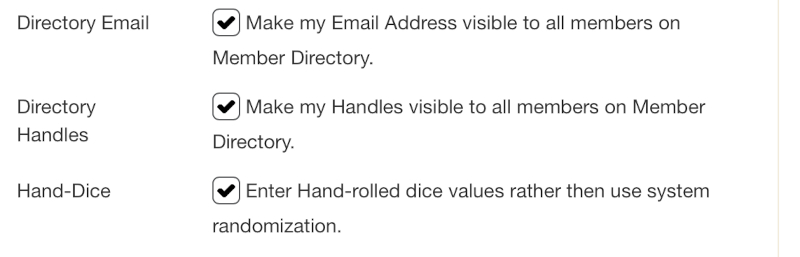
Yes! There is an option available in My Account that can be enabled to override the Virtual Dice, and instead ask to enter the physical dice roll results. * Note: This is an account level option, and will be enabled on All Characters in your account, this is not GM controlled.
From My Account, select the "Hand-Dice" checkbox:
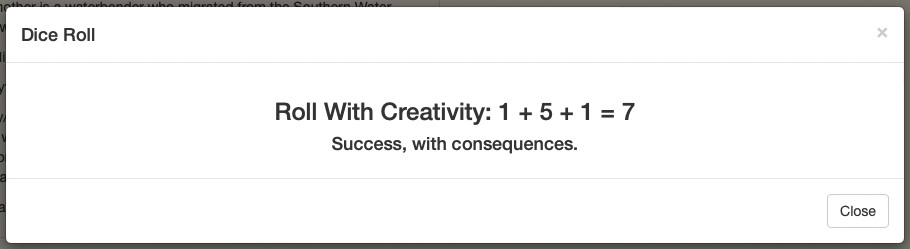
Once Hand-Dice is enabled, any dice roll trigger link will pop a dialog for you to enter the result of each die.
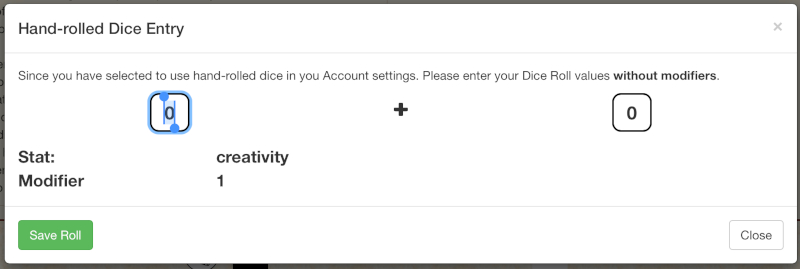
When you press the "Save Roll" button, the dice roll and any applicable modifier will be calculated, the result will display like a Virtual Dice Roll would, and it will be logged in the GM Campaign Session Log.
Yes. Most of the elements on the Character Sheet are rendered in a way so that they appear the same on all browsers, however in doing this for design esthetics; unfortunately, disables the normal keyboard tabulation of the elements. However, to resolve this, a series of custom keyboard combo commands are part of the character sheet.
The Keyboard combinations are:
Tracks ...
Fatigue: Alt + F + {1 - 5}
Balance: Alt + B + {1 - 7}
Statuses: Alt + S + {1 - 8}
Conditions: Alt + C + {1 - 5}
Popups ...
Moves: Alt + M
Inventory: Alt + I
Combat Exchange: Alt + X
Dice Rolls ...
Creativity: Alt + R + C
Focus: Alt + R + F
Harmony: Alt + R + H
Passion: Alt + R + P
Bonus: Alt + R + B
Tui Principle: Alt + R + T
La Principle: Alt + R + L
Dismiss popups: Esc
No. At this time, we do not have any built in support for battle maps. Since the combat of Avatar Legends is handled more as a narrative of the action in a theater of the mind setting; battle maps can be a bit more challenging to manage. There are no spell range rules or character movement rules like other systems, movement and actions are much more fluid.
A Campaign File Sharing feature has been implemented to allow for sharing of images, documents, even map files. We understand that sometimes "theater of the mind" needs a little help. These sharing options are not interactive like other D&D VTTs, but will help to get everyone on the same page.
If you do want to try to use battle maps for Avatar Legends; our staff, in our own RPG game play, have used Owlbear Rodeo™. If you are looking for a lightweight web-based interactive map sharing application, give them a try.
Please note: Owlbear Rodeo™ is an external third-party website and not bound by the same Privacy or Terms of Service agreements. Beyond Legend Games is not sponsored by or in any way affiliated with the creators of Owlbear Rodeo™; they are considered to be a trusted resource by our staff.
